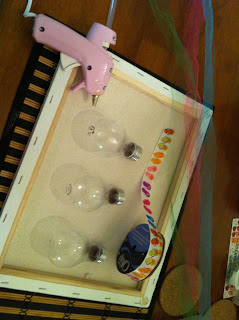
I first got this idea from a post on Pinterest (I'm hopelessly addicted to that site). It showed a photo of very basic (but beautiful) light bulb planters. I immediately wanted to do this project! I LOOOOOOOOVE doing crafts and being creative, and I also love reusing products whenever I can, so this project was PERFECT! However, I cheated a little bit. The light bulbs I used were brand new (shame on me). I didn't want to wait until a few of my bulbs blew, so I used some I had in the house. This project is for the reuse of burnt out light bulbs, if you wait or not, that's up to you!
This project is especially wonderful to decorate an apartment! You can decorate these planters in SOOO many ways. You can also grow plants inside them! How awesome is that! Once I get more light bulbs I plan on making lots more of these in all kinds of different styles!
For this project you will need
3 household light bulbs
1 pair of protective goggles, a dive mask will also work (VERY IMPORTANT!!!)
1 pair of protective gloves (to protect your hands from glass)
1 pair of very skinny needle nose pliers, or 1 pair of skinny scissors, and regular needle nose pliers
I regular size philips head screw driver
3 pieces of shimmer tulle (I used different colors)
A hot glue gun
7/8" ribbon (3 pieces about 4" and 3 pieces about 2")
Paper towels
Salt (not sea salt)
Ruler
How To Hollow Out Your Light Bulbs
Step 1
PUT ON YOUR GOGGLES & GLOVES!!! I cannot stress enough about just how important these are! Do not do this project with out them!
 |
| Safety First!!! |
This is the dangerous part, so please be extra super careful and WEAR YOUR PROTECTIVE GEAR!!!
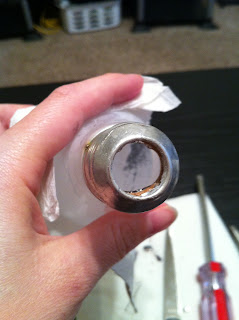
Get your bulbs, screw driver, scissors, pliers, and 2 paper towels. Lay one paper towel down (the light bulb insides will be put on here). Use the other one to hold the bulb with, just in case it breaks, it'll help with the clean up. Take your pliers and a twist the brass contact off.
 |
| The shiny circle is the brass contact |
The black stuff that the brass contact is on is actually glass, it's called the glass insulator. Once the brass contact has been removed, you will see a tiny little hole. I apologize, I did not take a picture of that. Using your very small need nose pliers or skinny scissors, break the insulator carefully (as seen below). Grip the insulator with your scissors or pliers and squeeze. Be careful as the insulator pieces can fly at you. I broke one piece of the insulator with a pair of scissors because my pliers were not small enough. After the one piece was broken, I used my pliers. You'll get the hang of it pretty quickly. Remember not to squeeze the light bulb very tight in your hand or you might break it.
Step 4
Once the insulator has been removed, you'll be able to see the the filament supports. Take your screw driver and break the filament support. It's glass and brass wires. It may help if you use your pliers to push and pull on the brass wire. Once thats broken, take your screw driver and in a mixing type motion continue to break the filament. Pull the brass wires out with your pliers. Empty the bulb contents onto your paper towel. This is what will come out of the bulb.
 |
| Light Bulb Insides |
 |
| Your bulb should now look like this |
Step 5
Now you need to clean your bulb. You'll notice that what makes your bulb white is simply powder (kaolin, and its safe as long as your don't ingest it or get it in your eyes, which you won't bc your wearing your protect gear!). Take about a teaspoon or so of salt and pour into your bulb. Swish it/shake it until most, if not all of the white powder is removed. Empty the bulb, and rise thoroughly with water.
 |
| Dirty Bulb |
Once the bulb has been rinsed out, take a paper towel and dry is the best you can. You don't need to get it completely dry.
 |
| Drying your clean bulb |
 |
| TADA!! |
Decorating Your Planters
Now you'll need your ruler, tulle, ribbon, scissors, and hot glue gun (my ruler isn't shown, but it's there. You can always guess, I measured just for you guys, normally I wouldn't have)
Step 1
Glue one piece of shimmer tulle onto your bulb. I didn't measure my tulle lengths, but you will want them at all different lengths, so when they move around they won't smash into each other and break.
You don't have to, but I folded my tulle in half (in case of a tear it'll be better supported). I glued the fold to the silver part of the bulb.
Step 2
Cut your ribbon (just enough to wrap around the silver part of the bulb, and over the spot where you glued your tulle. Glue the ribbon around the silver part of the bulb, covering your tulle. This is what it'll look like. It's okay to have some of the ribbon overlap, once it's done and hanging you won't be able to tell. Either put a coat of clear nail polish at the end of the ribbon, or just use hot glue (thats what I did), so it won't fray.
Step 3
Okay, so now that you've got the bottom part decorated, its time to work on the top. Take the top part of your tulle and form a loop.
Once your loop is formed, hot glue the (approx.) 2" of ribbon around the tulle.
TADA!
Once your finished, you'll have this...
The colors in person are very bright.


These are very awesome!
ReplyDelete